Note: After completing the configuration of LOYALTY-SECU network print server, you need to add a network printer to the Windows 10 or 11 computer for printing via network.
Please follow the below steps to install a network printer on Windows 10/11 system:
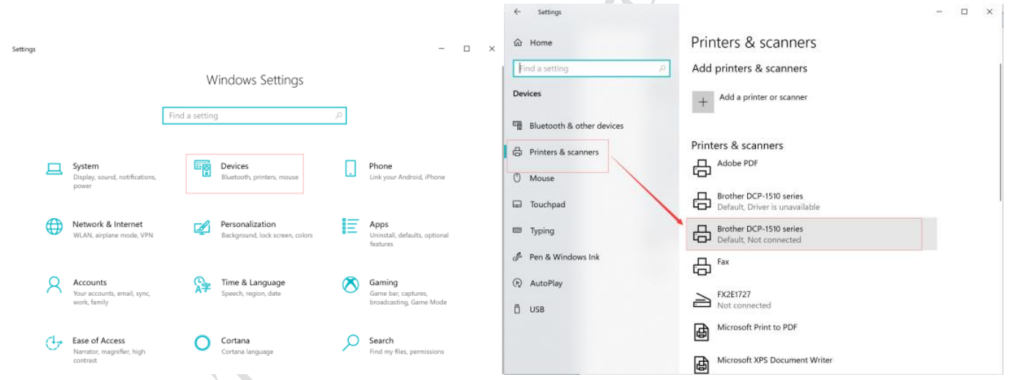
1. Click the “Start” menu and select “Settings.”
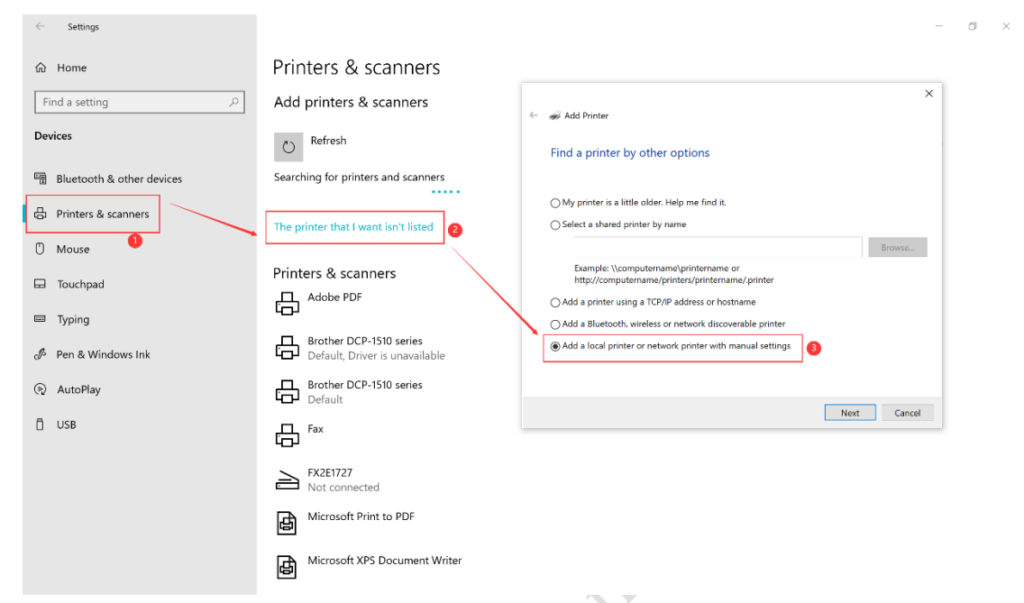
2. Choose “Devices” and then select “Printers & scanners“.
3. Click on “Add a printer or scanner“. If you don’t find your printer in the list, click on “The printer that I want isn’t listed” and choose option ③ as shown below:
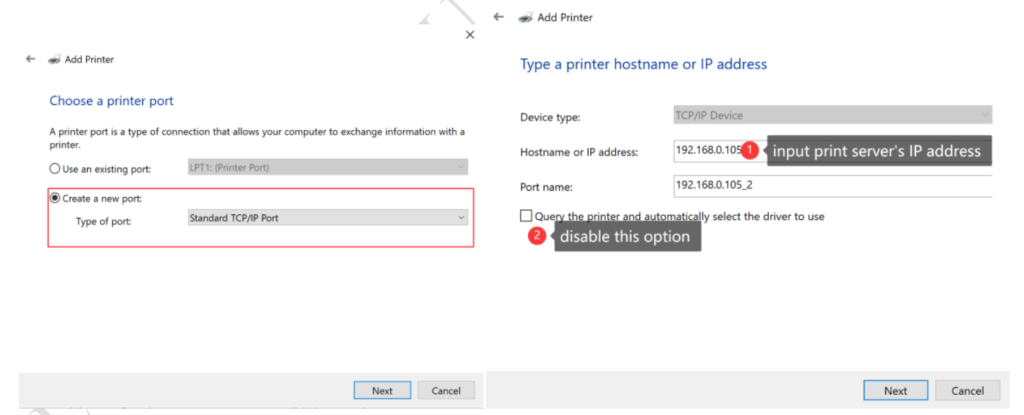
Click “Create a new port” and select “Standard TCP/IP Port” as the type of port. Then click the “Next” button as shown below:
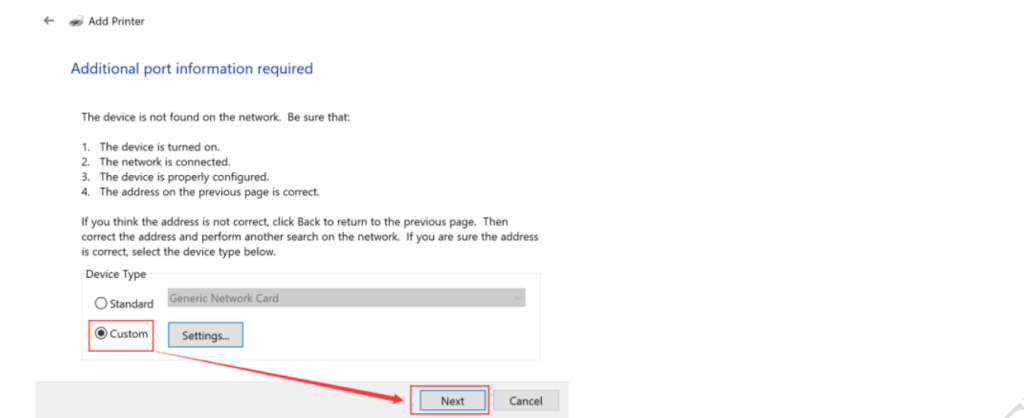
Click the “Next” button to continue, which will display the setting interface as shown below. Choose “Custom” and click “Next” to proceed to the next step:
If you cannot find the printer driver for your specific brand and model in the list (①), you can obtain it from options ② and ③, as shown below:
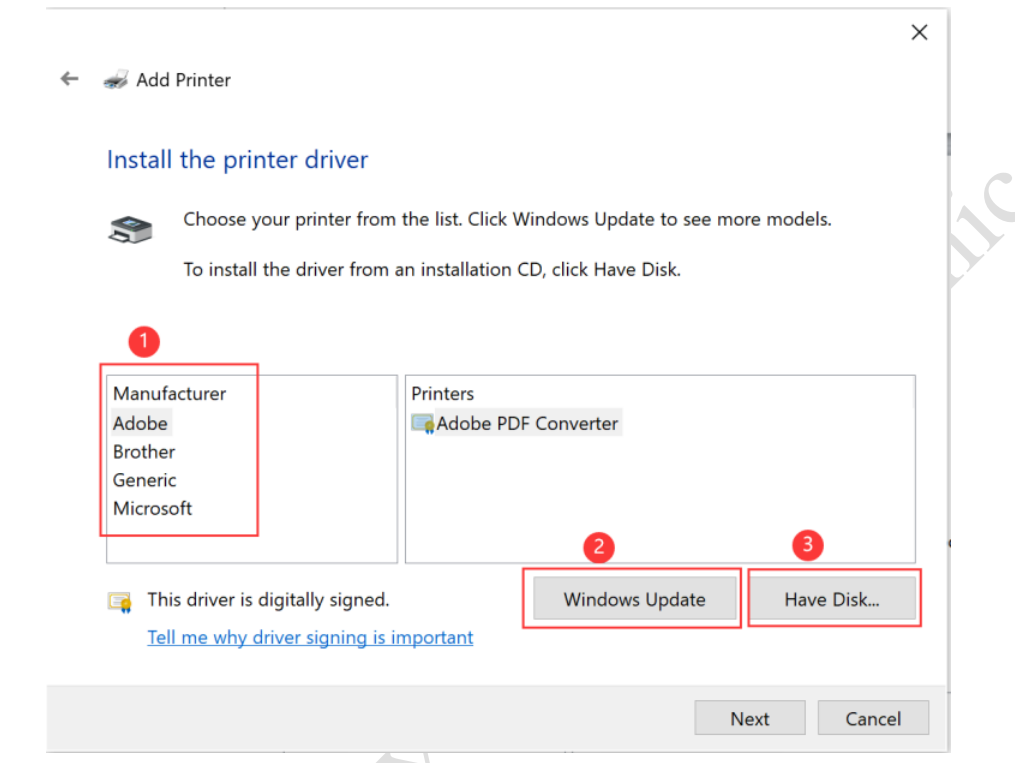
After clicking “Windows Update,” a list of printer driver brands will be displayed, as shown below: If you cannot find the printer driver for your specific brand and model, please click on “Have Disk” and copy the printer driver provided by your USB printer manufacturer from your disk. Follow the instructions to install the driver into the computer. Please refer to the image below for reference:

Note: If you are unable to obtain the printer driver from “Windows Update” or “Have Disk“, you can try connecting your USB printer directly to the computer. This will allow the computer to install the printer driver automatically. Alternatively, you can contact your USB printer supplier to obtain the appropriate printer driver.
After completing the installation, click “Next“. Then, click on the “Start” menu, choose “Settings“, select “Devices“, and click on “Printers & Scanners“. Finally, choose the target printer as shown below:
Remarks:
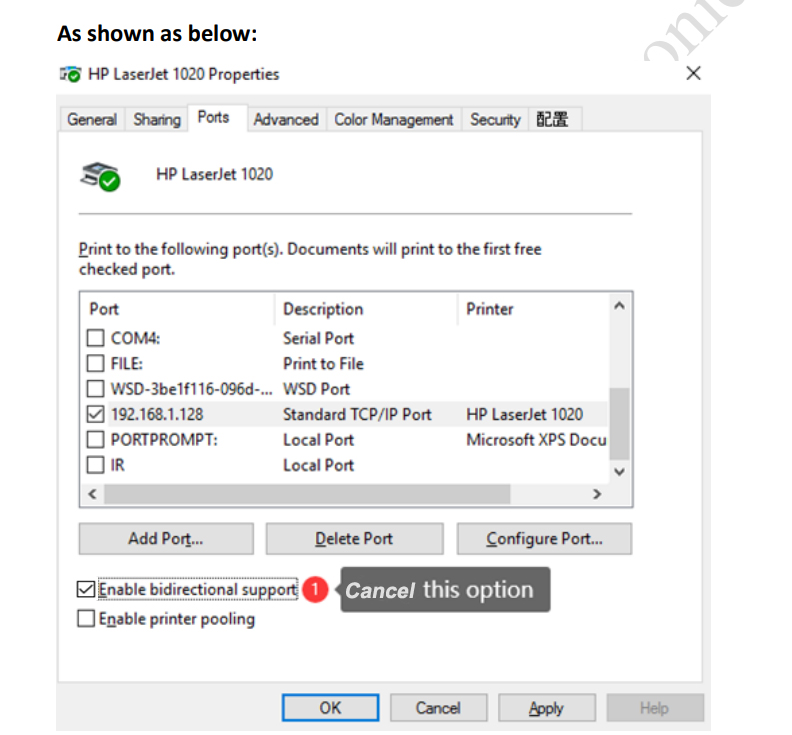
For some old HP models such as: HP1020, HP M1005, HP1007(x) series, HP1106(x) series, etc. Please do not run “print a test page” during the installation of the network printer, otherwise the problem of repeated printing will occur. After the installation is complete, please follow the following steps to modify the printer properties:
*Need to cancel “Enable bidirectional support“
* For some old HP models, you must cancel this option, otherwise the printer will keep repeating printing tasks.
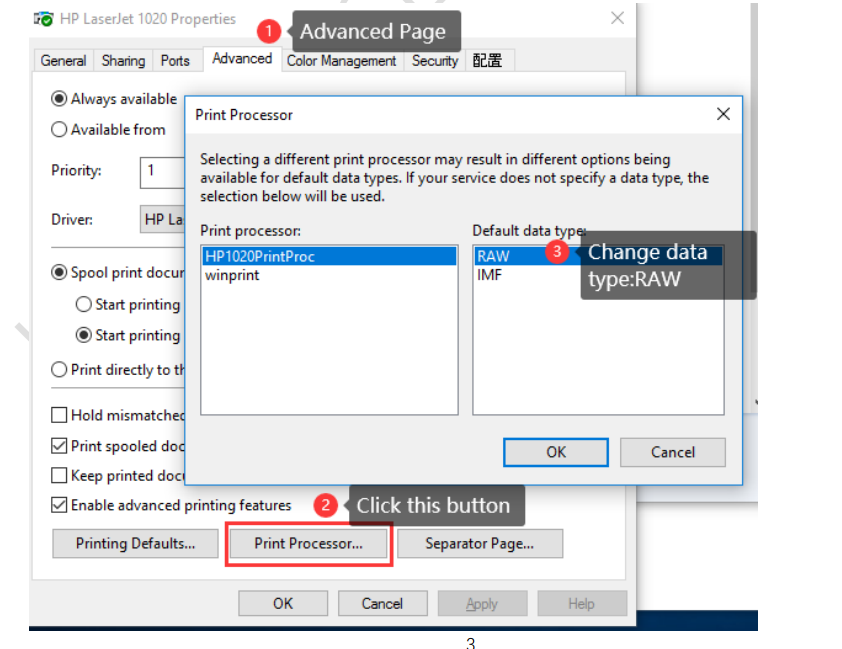
* Check whether the current printing data type is “RAW”
Please pay attention to some old HP models: Such as HP1020, HP1006, HP1106, HP1136, HP M1005 etc
HP1020 is a special printer, after installation the default data type is IMF, so it needs to be manually changed to RAW. Most printers on the market currently support RAW. Generally, no modification is required. (we suggest to check the data type after the installation).
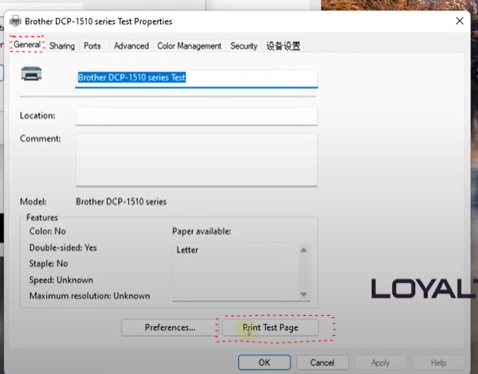
Now, the network printer has been installed successfully on the Windows 10 11 computers. Please Go to General -Print Test Page to print.
Presents by Shenzhen LOYALTY-SECU Technology Co., LTD


